Camry spark plugs are some of the longest-lasting parts on the car. Toyota has been shipping iridium plugs since the early 2000s, and the official interval on most engines is 100,000-120,000 miles.
Plenty of owners ride that number out to the mile and only think about plugs once the engine starts hesitating at a stoplight.
It doesn’t have to work that way — plugs are cheap enough, and the payoff in responsiveness and fuel economy is real enough, that treating the interval as a ceiling rather than a target is worth considering.
This guide breaks it down by generation and engine, plus the parts of the job nobody mentions until you’re elbow-deep in the intake manifold.
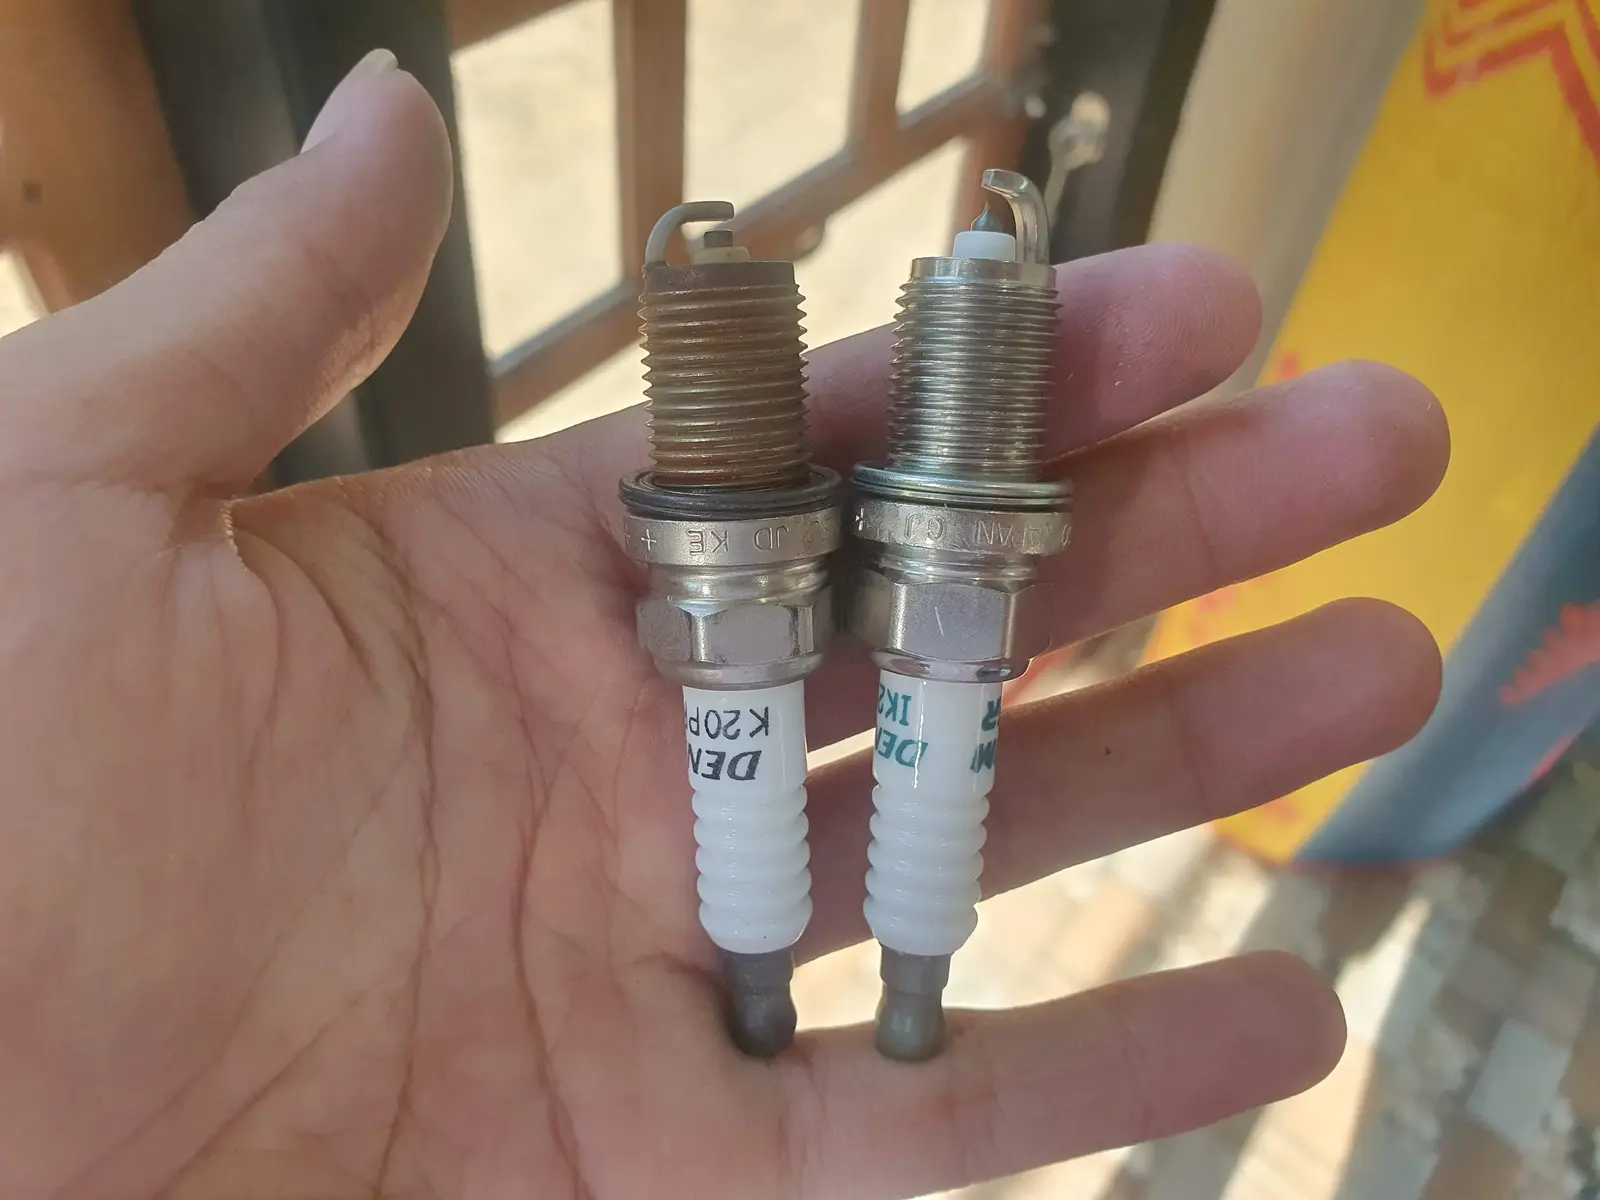
Signs Your Plugs Are Overdue
- Rough idle or a shudder at stop lights — usually the first thing owners notice, especially on the V6.
- Hesitation on acceleration, particularly merging onto a highway or passing.
- Noticeable drop in fuel economy — worn electrodes make combustion less efficient.
- Misfire codes (P0300 series) or a flashing check engine light. A flashing light means an active misfire — stop driving before it damages the catalytic converter.
- Hard cold starts — the plug has to work harder to fire a wider gap, and cold mornings expose that first.
None of these symptoms are exclusive to spark plugs — a failing ignition coil or a dirty MAF sensor can mimic all of them.
If you’re seeing any of this and the plugs haven’t been touched in a while, they’re the cheaper thing to rule out first, regardless of exact mileage.
Why Wait for Symptoms At All?
Here’s the thing about that list above: by the time any of it shows up, you’ve already been losing performance and fuel economy for a while.
There’s a real case for replacing plugs ahead of Toyota’s interval rather than waiting for a misfire code to make the decision for you.
Swap in a fresh set of iridium plugs on an engine that’s been running tired ones, and the difference is immediate — the throttle response tightens up, and it’s common to pick up something in the neighborhood of 2 mpg.
That doesn’t sound like much on paper, but over a year of driving, that’s a meaningful chunk of change back in your pocket, not just a rounding error.
The math makes early replacement close to a no-brainer. A quality iridium plug from Bosch or NGK runs around $15 each — call it $60-90 for a full set depending on cylinder count. Against that cost, replacing plugs a bit early has basically no downside.
Just make sure whatever you buy is iridium, not copper or standard platinum; that’s what actually holds the gap and the performance over time.
Spark Plug Specs by Generation
Toyota changed engine families several times over the Camry’s run, and the plug spec changed with them.
Here’s what each one actually calls for, cross-checked against Toyota factory service data and owner-confirmed part numbers.
1997–2001 (XV20) — 5S-FE 2.2L I4 / 1MZ-FE 3.0L V6
| Spec | 4-Cylinder (5S-FE) | V6 (1MZ-FE) |
|---|---|---|
| Plug type | Denso PK20R11 / NGK BKR6EP11 | Denso PK20TR11 / NGK BKR6EKPB11 |
| Gap | 1.1 mm (0.043 in.) | 1.1 mm (0.043 in.) |
| Plug count | 4 | 6 |
Source: Toyota factory service specifications, 1996-1997 Camry.
2002–2006 (XV30) — 2AZ-FE 2.4L I4 / 1MZ-FE & 3MZ-FE V6
| Spec | 4-Cylinder (2AZ-FE) | V6 |
|---|---|---|
| Plug type | Denso SK20R11 (iridium) | Denso SK20HR11 or equivalent |
| Gap | 1.0–1.1 mm (0.039–0.043 in.) | 1.0–1.1 mm (0.039–0.043 in.) |
| Interval | ~100,000–120,000 mi (iridium) | ~100,000–120,000 mi (iridium) |
2007–2011 (XV40) — 2AZ-FE 2.4L I4 / 2GR-FE 3.5L V6
| Spec | 4-Cylinder (2AZ-FE) | V6 (2GR-FE) |
|---|---|---|
| Plug type | Denso SK20R11 (Denso #3297, iridium) or NGK 4589 (IFR6T-11) | Denso/NGK iridium per factory service data — confirm exact PN at parts counter for your build |
| Gap | ~1.1 mm (0.043–0.044 in.) | ~1.1 mm (0.043–0.044 in.) |
| Torque | 13-14 ft-lb (per AutoZone/Go-Parts repair data) | 13-18 ft-lb — owners report both specs depending on source; torque to 13 ft-lb if using anti-seize, 18 ft-lb dry |
| Access | Straightforward, coil-on-plug, top of engine | Front 3 plugs easy; rear 3 require pulling the intake manifold |
2012–2017 (XV50) — 2AR-FE 2.5L I4 / 2GR-FE 3.5L V6
| Specs | 4-Cylinder (2AR-FE) | V6 (2GR-FE) |
|---|---|---|
| Plug type | Denso SK16HR11 (iridium) | Denso/NGK per factory service data — confirm at parts counter for your VIN |
| Gap | 1.0–1.1 mm (0.039–0.043 in.), max wear 1.3 mm (0.051 in.) | Same family spec |
| Interval | 120,000 mi | 120,000 mi |
2018–2024 (XV70) — A25A-FKS 2.5L I4 / 2GR-FKS 3.5L V6
| Spec | 4-Cylinder (A25A-FKS) | V6 (2GR-FKS) |
|---|---|---|
| Plug type | Denso FC16HR-Q8 (Denso #3524), Toyota OEM PN 90919-01289 | Denso FK20HBR8, Toyota OEM PN 90919-01263 |
| Torque | 18 ft-lb (24 Nm) | 18 ft-lb (24 Nm) |
| Interval | 120,000 mi | 60,000 mi — the V6’s shorter interval catches a lot of owners off guard |
| Access | Easy — plugs sit right under the coils | Rear three plugs need the upper intake manifold pulled |
V6 owners: note the interval gap. The 3.5L calls for plugs at half the mileage of the 2.5L on the same generation — 60,000 miles versus 120,000. It’s an easy detail to miss if you’re used to the four-cylinder’s schedule.
A note on hybrids
The Camry Hybrid runs the same basic 2.5L block as its gas sibling (2AR-FXE through 2018-2024, A25A-FXS from 2025 on) with iridium plugs and a similar 120,000-mile interval.
The owner’s manuals for these cars — including the 2020 and 2025 Hybrid manuals — cover replacement procedure but don’t print the gap in inches; that number lives in the separate factory service data, not the glovebox manual. Don’t rely on the owner’s manual alone if you’re gapping plugs by hand.
Tools You’ll Actually Need
- Spark plug socket, 5/8″ (16mm) with a rubber insert to grip the ceramic — a regular socket will drop the plug down the tube
- 3/8″ ratchet plus 3″, 6″, and 8″ extensions (the combination matters more on the V6’s rear bank than any single “right” extension)
- A U-joint or wobble extension for the rear bank on 2GR-equipped cars
- Torque wrench rated for low inch/foot-pounds — this is not a job to eyeball
- 10mm socket for coil bolts, plus a trim clip tool for the coil connectors
- Dielectric grease for the coil boots
- Anti-seize compound — optional, see below
- Compressed air or a shop vac to blow debris out of the plug well before pulling each plug
Four-Cylinder: The Easy Half of the Job
- Let the engine cool completely
- Disconnect the negative battery terminal.
- Remove the engine cover (usually 3-4 bolts or clips).
- Unplug each ignition coil connector, then remove the single 10mm bolt holding each coil, and pull the coils straight up.
- Blow out debris around each plug well before removing the plug — dirt falling into the cylinder is the single most common way this job goes wrong.
- Remove the old plug with the spark plug socket. Inspect it: even coloring across all four means the engine’s running clean; oil fouling on one plug points to a valve seal issue worth checking separately.
- Thread the new plug in by hand first — always. Cross-threading an aluminum head is an expensive mistake.
- Torque to spec (see tables above — don’t guess between 13 and 18 ft-lb; check which generation you have).
- Reinstall the coil, torque the coil bolt to about 80 in-lbs, and reconnect the connector.
V6: Where the Real Work Is
The front three plugs on the 2GR-FE/2GR-FKS come out the same way as the four-cylinder. The rear three are the reason V6 spark plug jobs run 3-4 hours instead of 45 minutes.
Forum write-ups on this job are consistent across the 1MZ-FE, 2GR-FE, and 2GR-FKS versions of this engine family (shared with the Avalon, Sienna, and ES350): you either pull the upper intake manifold, or you go in blind through the plenum openings with long extensions and a U-joint.
- Pulling the intake gives full visibility and is the safer bet for a first-timer, but adds new intake gaskets to the parts list and another hour of labor.
- Going in through the plenum is faster once you’ve done it before — DIYers report 30-45 minutes for the rear bank alone with the right extension combination — but it’s entirely by feel. Dropping a bolt or a plug down the intake port means pulling the manifold anyway to retrieve it.
Cover the intake ports with clean rags the moment the manifold is off, and don’t remove them until every tool and fastener is accounted for. This is the step most DIY write-ups repeat almost word for word, because it’s the step that turns a 4-hour job into a much longer one.
Anti-Seize: The Debate That Won’t Die
Search any Camry forum thread on this job and you’ll find owners split down the middle.
The case against it: modern OEM plugs already have a trivalent or zinc coating designed to prevent seizing, and Toyota’s own service procedure doesn’t call for it — some techs argue adding anti-seize on top of that coating actually changes the effective torque, over-tightening the plug for a given wrench reading.
The case for it: aluminum heads can gall over a 100,000+ mile interval, and a thin film makes the next removal far less stressful.
The practical middle ground most experienced DIYers land on: if you do use anti-seize, use a small dab on the threads only, and reduce your torque figure by roughly 30% versus the dry spec to compensate for the extra lubrication.
If you’re using genuine Denso or NGK OEM-spec plugs, skip it and torque to the standard spec — that’s what the plugs are designed for.
Cost to Expect
- Parts, 4-cylinder: $30-45 for a set of four OEM-spec iridium plugs.
- Parts, V6: $45-70 for six plugs, plus $15-25 in intake gaskets if you’re pulling the manifold.
- Shop labor, 4-cylinder: typically 0.5-1 hour billed.
- Shop labor, V6: 1.5-3 hours billed, since most shops pull the intake rather than work blind.
Whether you’re doing this at the full interval or pulling it forward a bit for the performance and mileage bump, V6 owners get one extra bonus if they use a shop: ask them to inspect the rear valve cover gasket while the intake’s already off. It’s exponentially cheaper to check it in the same visit than to pay to reopen the intake later for a separate leak.
Final Words
Plenty of Camry owners treat the interval chart above as the earliest they’ll consider new plugs, when it’s really just the latest.
If you’re already past the halfway point on the mileage for your engine and haven’t touched them, that’s reason enough on its own — you don’t need a misfire code to justify a $60-90 part swap that pays you back in throttle feel and a couple mpg.
And if you are already seeing a rough idle or a misfire, don’t wait for the number to line up at all. Either way, pull a plug and look at it — it’ll tell you exactly how much runway you had left.
If you have any further questions, please write them in the comments section—I’d be happy to help.